dEEpEst
☣☣ In The Depths ☣☣
Staff member
Administrator
Super Moderator
Hacker
Specter
Crawler
Shadow
- Joined
- Mar 29, 2018
- Messages
- 13,861
- Solutions
- 4
- Reputation
- 32
- Reaction score
- 45,552
- Points
- 1,813
- Credits
- 55,350
7 Years of Service
56%
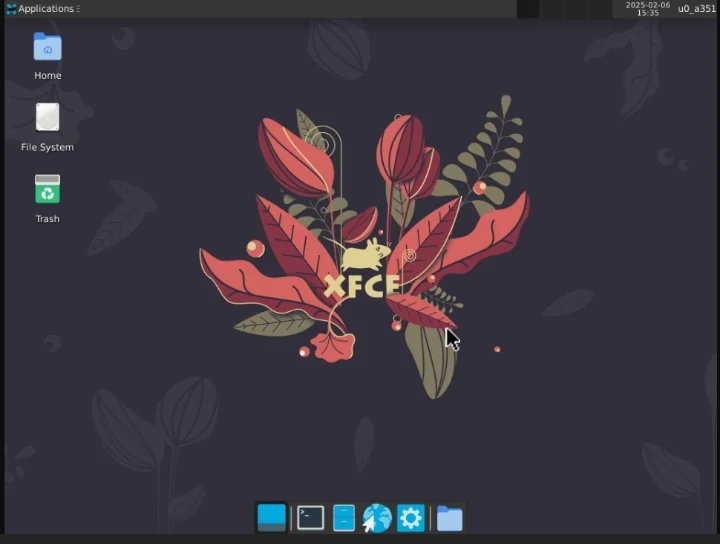
How to Set Up an XFCE4 Desktop Environment in Termux Using TigerVNC
If you want to run a lightweight desktop environment within Termux on your Android device, XFCE4 combined with TigerVNC is a great choice. Below is a quick guide to get you started.
---
1. Update and Upgrade Packages
First, make sure all existing packages are up to date. Open Termux and run:
Code:
pkg update -y && pkg upgrade -y

termux-setup-storage
The termux-setup-storage command grants the app permission to access your device’s storage.
---
2. Install Required Repositories and Packages
Next, enable the X11 repository and install XFCE4 along with TigerVNC:
Code:
pkg install x11-repo

pkg install xfce4

pkg install tigervnc
> Note: If you plan on using RealVNC instead, install it by replacing pkg install tigervnc with the RealVNC package.
---
3. Start Your VNC Server
Launch VNC with the following command:
Code:
vncserver -localhost---
4. Check and Edit the VNC Startup File
1. Display the default VNC startup file:
Code:
cat ~/.vnc/xstartup2. To edit the file, use a text editor:
Code:
nano ~/.vnc/xstartup3. Replace the contents (or comment out the old lines) with the following lines:
Code:
#!/data/data/com.termux/files/usr/bin/sh

xfce4-session
This configuration will automatically start the XFCE4 session when the VNC server launches.
4. Save your changes and exit Nano (press Ctrl + O then Enter to save, and Ctrl + X to exit).
---
5. Restart the VNC Server
After editing the startup file, restart the VNC server so it uses the new configuration:
Code:
vncserver -localhost---
6. Install Your Preferred VNC Viewer
To access the XFCE4 desktop from your local device:
1. Download and install any VNC viewer from your app store (e.g., RealVNC, VNC Viewer, etc.).
2. Open your VNC viewer and enter the address:
Code:
localhost:59013. Set a name for your connection (e.g., “MyTermuxXFCE”).
4. Connect, then enter the VNC password you created earlier.
---
7. You’re Done!
You should now see the XFCE4 desktop environment running on your Android device via Termux. Feel free to install additional apps and further customize your setup as desired.
---
Optional Tips:
You can stop the VNC server with vncserver -kill :1 (or another display number if you specified it).
Install other useful packages (like xorg-twm, aterm, etc.) if you prefer a different setup or window manager.
Make sure to set strong passwords and limit network exposure if you plan to connect from outside your local network.
If you have any questions or run into issues, feel free to ask in the thread! Enjoy your new XFCE4 desktop environment in Termux.
Credits for me
Last edited: