- Joined
- Jan 8, 2019
- Messages
- 56,623
- Solutions
- 2
- Reputation
- 32
- Reaction score
- 100,456
- Points
- 2,313
- Credits
- 32,750
6 Years of Service
76%
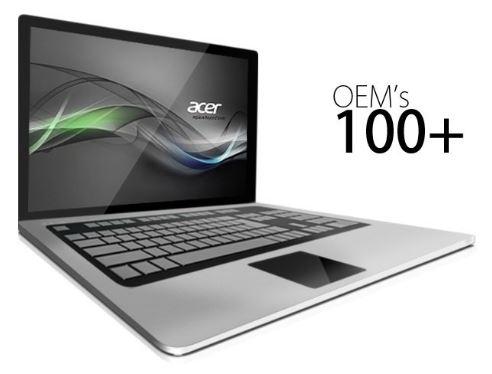
Multi OEM/Retail Project – included 100+ OEM’s: • Acer • Advent • Action • Alienware • AOC • Aquarius • ASRock • Asus • ATcomputers • Bangho • Beko • BenQ • BGH-SA • ByteSpeed • Casper • CCE • chiliGREEN • Compaq • crea • CZC • Dell • Depo • digimix • ECS • eMachines • Epson • Equus • Everex • Excimer • EXO • Exper • Extra • Founder • FSC • Fujitsu • Gateway • Genuine • Gericom • Gigabyte • Greatwall • Haier • Hannspree • Hasee • HCL • Hedy • Higrade • HP • Hyrican • IBM • Impression • Infinity • Insys • Intelbras • iQon • Itautec • Jetway • JooyonTech • Kohjinsha • Kouziro • Kraftway • KSystems • Lanix • Lenovo • LG • M&A Technology • Maxdata • Mecer • Medion • Megaware • Mesh • Mitac • Mouse • MSI • NEC • Nokia • Olidata • Olivetti • Onkyo • OQO • Packard Bell • Panasonic • Paradigit • Paragon • Philco • Positivo • PowerSpec • Prolink • qbex • Quanmax • RMplc • Rover • Samsung • SCC • Semp Toshiba • Seneca • Sharp • Sony • Stone • Synnex • Systemax • Tangent • Targa • Tarox • TCL • TTL • Tongfang • Toshiba • Trigem • Twinhead • Velocity • Vestel • Viewsonic • viliv • WD Corporation • Wortmann • xplore • Zoostorm • ZT ~incl. (branding only): BioStar • Foxconn • Intel • M$ $urface • VirtualBox • VMware
OEM’s Branded = 133~
• BIOS Mode supported: Legacy and/or UEFI
• You can force install ‘ANY’ brand theme by reading and using the Force_Theme_[readme].txt
Editions for OEM Activation
• Server 2008 • Server 2008 R2 • Server 2012 • Server 2012 R2
• Win10… • Home • Pro
• Win8.x… • Core • Pro
• Win7….. • Starter • Home Basic • Home Premium • Pro • Ultimate
• Vista….. • Starter • Home Basic • Home Premium • Business • Ultimate
Objective – add $oem$ folder to .iso /usb.
• $oem$ method can be used to apply activation & manufacturer brand to your Win10 • Win 8.x • Win 7 • Vista ‘.iso’/usb
• NOTE:- PC needs (Win8.x and Win10 ‘OEM-DM’ • Win7 ‘2.1 slic’ • Vista ‘2.0 slic’) bios to apply genuine oem activation.
• Project includes optional Telemetry disabling, (WinTel.cmd), for all supported OS’s and adds domains to block through Route commands.
How To:
Win8.x|Win10
Place the downloaded ‘$oem$’ folder in the ‘sources’ folder of your ‘clean’ iso, and add custom ‘ei.cfg’ file to the same ‘sources’ folder and edit|save iso. Windows will install the edition identified from ‘ei.cfg’ file. (Project ‘Options’ folder includes ‘ei.cfg’ instructions). OOBE.cmd will call tool that will extract embedded ‘OEM-DM’ key from bios (if exists), and apply the serial during installation.
Win7
Place the downloaded ‘$oem$’ folder in the ‘sources’ folder of your ‘clean’ iso, and delete the ‘ei.cfg’ file from the same ‘sources’ folder and edit|save iso… during install you will have option to select the edition of ‘Win7’ you want installed (ie. Starter • Home Basic • Home Premium • Pro • Ultimate)… if you don’t delete ‘ei.cfg’ file, that’s OK, just means Ultimate will install by default.
Vista
Place the downloaded ‘$oem$’ folder in the ‘sources’ folder of your ‘clean’ iso, and delete the ‘PID.txt’ file (if exists) from the same ‘sources’ folder and edit|save iso… during install you will have option to select the edition of ‘Vista’ you want installed (ie. Starter • Home Basic • Home Premium • Business • Ultimate)… if you don’t delete ‘PID.txt’ file, that’s OK, just means serial used on that file will determine edition installed.
• Please read the ‘readme’ files included in the download folder, for additional information.
• “UltraISO” recommended to edit|save your .iso, preserving ‘bootable’ image.
Editions for OEM Activation:
• Win10.. • Technical Preview • Consumer Preview
• Win8.x… • Core • Pro
• Win7…. • Starter • Home Basic • Home Premium • Pro • Ultimate
• Vista…. • Starter • Home Basic • Home Premium • Business • Ultimate
• (Vista-Win10) If not known edition, branding only takes place.
Objective – add $oem$ folder to .iso /usb.
• $oem$ method can be used to apply activation & manufacturer brand to your Win10 • Win 8.x • Win 7 • Vista ‘.iso’/usb
• NOTE:- PC needs (Win8.x and Win10 ‘OEM-DM’ • Win7 ‘2.1 slic’ • Vista ‘2.0 slic’) bios to apply genuine oem activation.
How To: (Win 10)
– Place the downloaded ‘$oem$’ folder in the ‘sources’ folder of your ‘clean’ iso, and edit|save iso. OOBE.cmd (Install.cmd) will extract embedded ‘OEM-DM’ serial from bios (if exists), and apply the serial during installation.
How To: (Win8.1)
– Place the downloaded ‘$oem$’ folder in the ‘sources’ folder of your ‘clean’ iso, and add custom ‘ei.cfg’ file to the same ‘sources’ folder and edit|save iso. Windows will install the edition identified from ‘ei.cfg’ file. (Project ‘Options’ folder includes ‘ei.cfg’ instructions). OOBE.cmd (Install.cmd) will extract embedded ‘OEM-DM’ serial from bios (if exists), and apply the serial during installation.
How To: (Win8.0)
– Place the downloaded ‘$oem$’ folder in the ‘sources’ folder of your ‘clean’ iso, and edit|save iso. Windows will install the edition that matches the embedded ‘OEM-DM’ serial in your bios (if exists).
How To: (Win7)
– Place the downloaded ‘$oem$’ folder in the ‘sources’ folder of your ‘clean’ iso, and delete the ‘ei.cfg’ file from the same ‘sources’ folder and edit|save iso… during install you will have option to select the edition of ‘Win7’ you want installed (ie. Starter • Home Basic • Home Premium • Pro • Ultimate)… if you don’t delete ‘ei.cfg’ file, that’s OK, just means Ultimate will install by default.
How To: (Vista)
– Place the downloaded ‘$oem$’ folder in the ‘sources’ folder of your ‘clean’ iso, and delete the ‘PID.txt’ file (if exists) from the same ‘sources’ folder and edit|save iso… during install you will have option to select the edition of ‘Vista’ you want installed (ie. Starter • Home Basic • Home Premium • Business • Ultimate)… if you don’t delete ‘PID.txt’ file, that’s OK, just means serial used on that file will determine edition installed.
• Please read the ‘readme’ files included in the download folder, for additional information
• UltraISO recommended to edit|save your .iso, preserving ‘bootable’ image
Included link for images to be used with System Brand Changer if users prefer using a desktop branding tool with a nice gui, created by Alphawaves.
Code:
https://forums.mydigitallife.net
To see this hidden content, you must like this content.